Lifestyle
Designing with Canva: Templates, Layout, and Export Quality Checks
Canva templates help start a design, but size, text, brand assets, and export settings still need checking. Using an original community used-book swap notice, this guide covers template edits, brand rules, and PNG, JPG, and PDF delivery, plus limits on transparent backgrounds, paid assets, and print bleed. A comparison table, steps, and original diagrams help organize editable designs and shareable files, without judging export accuracy from the editor alone.
About 8 min read
Contents
- 1. Define the purpose and content before choosing a template
- 2. Keep designs consistent with simple brand rules
- 3. Check paid features and asset licensing separately
- 4. Choose an image format or PDF for the intended delivery
- 5. Check print and digital versions separately
- 6. Begin the final proofread after downloading
The same event announcement may need to appear on social media, be emailed to participants, and be printed for display at a shop entrance. Simply resizing the same image can make text too small, distort proportions, or leave edges cropped in print. Before using Canva, list where each finished item will appear.
The following uses an original community used-book swap announcement as an example, based on Canva's official guidance consulted on 2026-9-14. No account was logged into, plan purchased, or print order placed for this article. The event, text layout, and illustrations were all created from scratch; no ready-made template was used as a deliverable image.
Define the purpose and content before choosing a template
Write the event name, date, venue, participation instructions, and contact information as plain text, and confirm them before arranging the layout. This example can have a social media announcement and a printed notice: both use the same information, but reading distances and layout proportions differ. Confirm dimensions against the actual publishing platform and printing requirements; no template name represents a universal specification for every use.
Search for templates on Canva's homepage, preview one, then choose to customize it to enter the editor. You can also search in the editor's Templates panel. When choosing, consider information density, the arrangement of text and images, and room for changes, rather than color alone. If the event has many rules, a layout with space for explanations is more practical than squeezing text into an image-focused template.
After applying a template, replace the sample content item by item. Pay particular attention to dates in corners, names in footers, and outdated information left on duplicated pages. People, images, and copy in a template are only a starting point for the design; they do not automatically reflect the actual event. If you use AIWhat Is Artificial Intelligence?AI covers many technologies and uses; it is not synonymous with chatbots and need not generate text. Starting with the OECD system definition, this article uses photo classification and community resource recommendations to link inputs, inference, outputs and human goals, and explains AI's relationship to machine learning, deep learning and generative AI. Learn to ask concrete questions about what an AI feature does and distinguish capability, autonomy and trustworthiness.Read the full article to help rewrite the text, you must still verify the facts and terminology used in Taiwan yourself.
Keep designs consistent with simple brand rules
First choose primary and secondary text styles and a small set of colors, then create a one-page reference example. In this example, the event name is most prominent, followed by the date and venue, with book-swap rules organized into paragraphs. Align the edges of text and images, leave whitespace, and avoid giving every section both a heavy font weight and a strong background color.
Canva's Brand Kit can organize logos, colors, fonts, and other brand resources. How kits are created and shared depends on the plan and role. If a team needs shared access, confirm which Brand Kit is actually being used, who can edit it, and the access permissions for linked folders. A brand asset appearing in the list does not mean every collaborator has the same permissions.
If your current account lacks the brand management features you need, you can keep a design rules page recording color codes, font names, frequently used paragraphs, and the locations of your own image files. Confirm usage rights before uploading fonts or logos. Manually compare duplicated designs against this reference, so changing templates does not also replace the visual identity and event name.
Check paid features and asset licensing separately
You can start designing in Canva for free, but some assets and export options are restricted by plan. The official transparent-background guidance lists supported plans including Pro, Teams, Business, Education, and Nonprofits. The fact that PNG files can support transparency does not mean every account can use Canva's transparent-background download feature, nor does it mean a background image has been removed.
If a payment prompt appears when downloading, first identify the asset or option causing it. Free users can follow the interface to purchase a Pro Content license, change the assets, or consider a plan. Being able to preview something on the canvas does not mean you have secured the rights to use it. Prices and subscription terms depend on the actual account and checkout page; this article does not provide promotional codes or guarantee fixed prices.
The current content terms regulate Free, Pro, Branded, and Education content separately, and stricter restrictions may apply when they are combined. Branded Content is generally limited to personal use, while Education Content is limited to educational and noncommercial use. An asset appearing in the free section does not make it available for commercial promotion. Check each asset's source information before deciding.
Choose an image format or PDF for the intended delivery
For purely static social media graphics, JPG can suit photo-focused images that do not require transparency. PNG suits situations requiring crisp graphics or transparency, though actual file sizes still need comparing. After downloading, check pixel dimensions and text edges. Do not assume a file suits every platform just because of its extension or the highest-quality setting.
Consider PDF Standard for document reading. For printing, assess PDF Print, color representation, bleed, and crop marks according to the print provider's requirements. PDF Print cannot restore real detail missing from low-resolution originals, and SVG export cannot automatically turn embedded raster images into vectors that stay sharp at any scale.
Canva specifically warns that PDFs may retain the full original content of cropped images. If part of an original image should not be public, cropping it in Canva does not mean it has been deleted. Prepare an image file without that content before inserting it. Flatten PDF merges design content and may increase file size; it is not a comprehensive guarantee against editing or disclosure.
Check print and digital versions separately
For print, keep important text in a safe position and extend edge-to-edge backgrounds into the bleed area. Canva's margin guides, bleed, and crop marks serve different purposes. The marks appear in the exported PDF; simply seeing a line in the editor does not complete the process. External print providers may have their own size and bleed specifications, so obtain their requirements first.
For a social media version, check text size and cropping on the target device, keeping important text where it is easy to read. Switching to another aspect ratio requires rearranging the title, time, and rules, rather than merely resizing the entire image. Even with automatic resizing, check every page for line breaks, overlaps, and cropped information.
If the design includes a QR code, scan the actual exported file to confirm that it links to the correct page, and provide a readable alternative URL or contact method. Do not hide all participation instructions inside an image. When publishing on social media, include event information in the post text so people who cannot clearly see the image still know how to take part.
- Confirm the finished item's purpose, dimensions, and event information, then choose a template with room for the content.
- Replace all sample text, standardize fonts and colors, and check asset sources.
- Go from Share to Download, then select the format, pages, and available export options.
- Open the actual downloaded file to check text, images, and links, then organize the finished files and editable sources.
Begin the final proofread after downloading
For a multipage design, first confirm whether to export all pages, the current page, or selected pages, so backup drafts are not delivered by mistake. After downloading, check each page's dates, phone numbers, page numbers, accent marks or Traditional Chinese character forms, and whether images have shifted. Filenames can include the event, purpose, and version to distinguish social media files, print files, and drafts awaiting revision.
Keep the editable Canva source along with the actual delivered files and asset records. When handing a design to collaborators, confirm link permissions and make clear whether they can view, comment, or edit. If a design contains platform assets and will be transferred to a client, also check the content terms for conditions such as transfer to a single client and a written agreement. Do not bundle standalone assets as a stock library that can be freely resold.
Finally, test the design as a reading task: can the recipient quickly find the time, venue, participation requirements, and next step? Canva makes layout work easier, but accurate information, permitted asset use, and export quality still require human checks. Keep these records with the original files so the next event update does not require rebuilding from a compressed image.
Read the full description
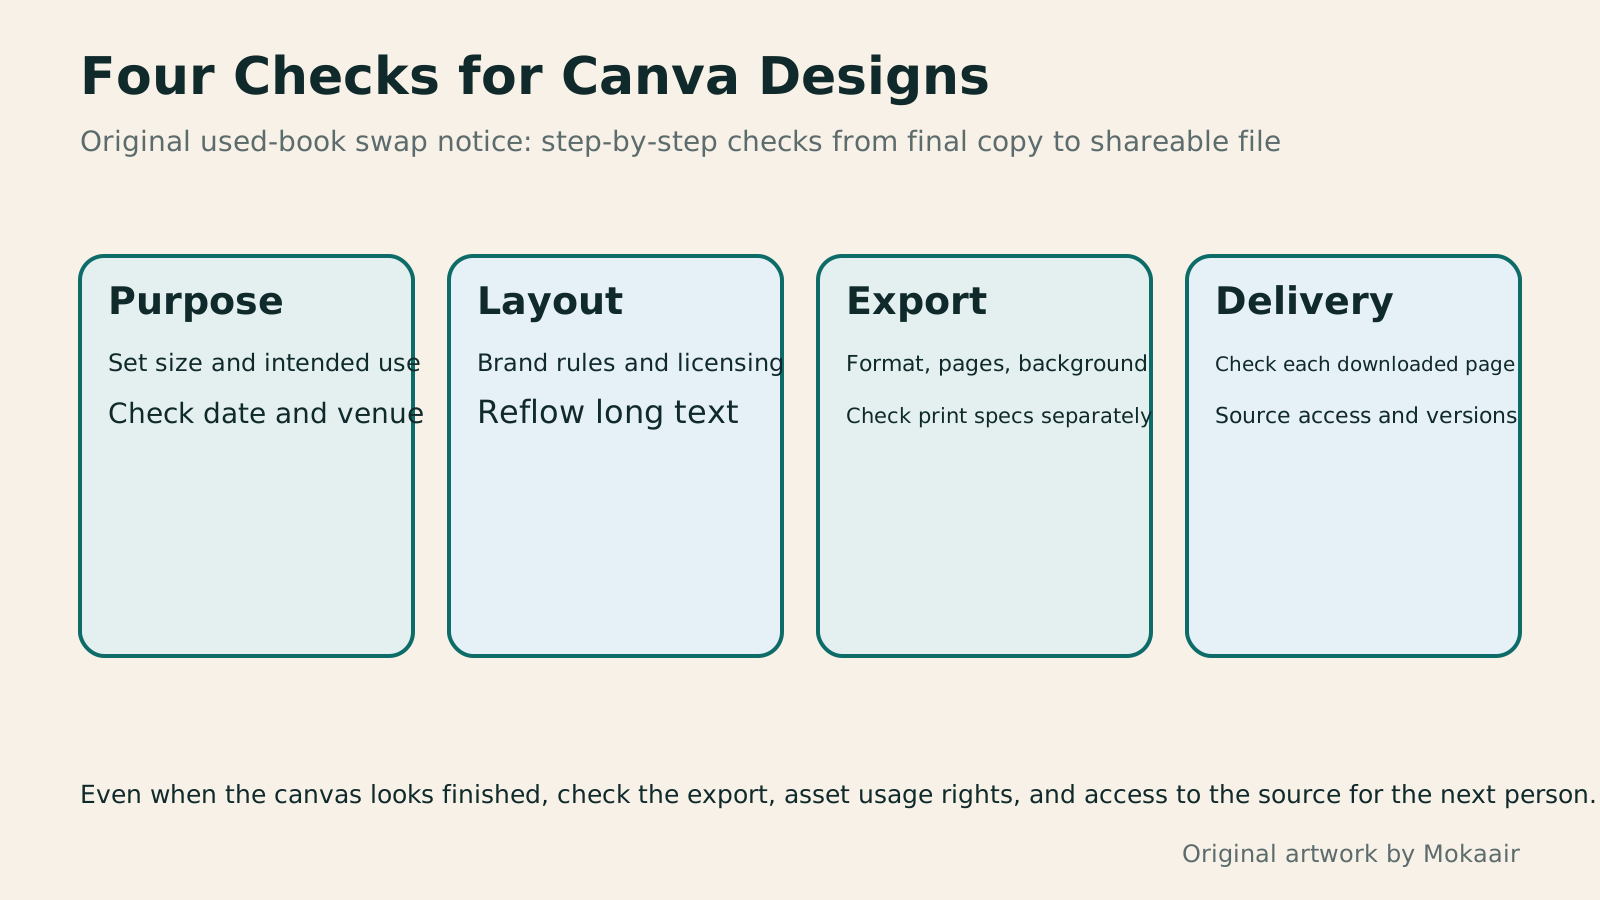
Four cards explain checks for purpose, layout, export, and delivery, distinguishing the editor view from the actual downloaded file.
| Output or feature | Suitable uses | What to check after downloading |
|---|---|---|
| JPG | Photo-focused static images | Detail after compression and text clarity |
| PNG | Text and graphics; transparent export where available | Actual transparency and account features |
| PDF Standard | Document reading and sharing | Pages, links, and content not intended for disclosure |
| PDF Print | Files prepared to printing requirements | Dimensions, color, bleed, and proofs |
| SVG | Delivery of graphics suited to vectors | Embedded images and support in the receiving tool |
| Editable design | Later revisions and collaboration | Permissions, versions, and asset terms |
First distinguish RGB and CMYK delivery requirementsChoosing Between RGB and CMYK: Screens, Print, and File ExportThe same event artwork can look vivid on a website but different on a printed flyer. Using original community swap market materials, this article explains RGB, CMYK, color profiles, and soft proofing, with web and print export steps, a handoff comparison table, and original diagrams. It helps general users check the purpose and print conditions before choosing a conversion method, avoiding confusion between profile assignment and conversion or delivery after merely renaming a file.Read the full article
Compare image formats and compression methodsChoosing WebP, JPEG or PNG: Let Content Guide Format and CompressionSmaller files take more than lower image quality: check content, transparency, display size and platform support first. With an original cooking-notes page, this article compares WebP, JPEG, PNG and SVG, explains pixel dimensions versus file size, and covers saving originals, exporting candidates and checking images served by the site. A comparison table, steps and original diagrams help preserve text and ingredient detail without a fixed compression ratio or quality value for all images.Read the full article
Organize licensing records for assets cleared for commercial use
Found this guide helpful? Share it with someone who needs it
Lifestyle
Agentic Retrieval-Augmented Generation (Agentic RAG): When to Search Again
Agentic RAG lets models make retrieval decisions, choosing sources, rewriting queries or searching further based on the question and available evidence. Using a concrete LangGraph workflow and a comparison of venue-use conditions, this article contrasts it with fixed RAG and explains stopping criteria, permissions, query logs and cost control. Learn to judge whether a task needs dynamic exploration or a predictable fixed workflow is enough.
Lifestyle
Graph Retrieval-Augmented Generation (GraphRAG): Understanding a Document Collection Through Relationships
GraphRAG uses entities and relationships in retrieval to answer questions about cross-document connections and overall themes. Drawing on Microsoft's original paper and official docs, this article explains entity extraction, community summaries, and local and global search, using local event records to show why different questions need different paths. It also shows how missing links, mistaken name merges, and distorted summaries affect answers: a pretty graph is not verified fact.
Lifestyle
Knowledge Graphs: Making Entities and Relationships Clear
Knowledge graphs organize entities and relationships to trace who took part in what, where and when through links. Using community events, this article covers entity identity, relationship direction, sources and time; compares Resource Description Framework (RDF) and property graphs; and explains why graphs are not equivalent to visualizations or reliable facts. Learn when to build one and how it works with tables, vector search and graph retrieval-augmented generation (GraphRAG).
Lifestyle
Hybrid Search: Balancing Exact Terms and Meaning
Hybrid search merges full-text, vector and other retrieval results to cover exact codes and natural-language needs. An equipment-manual query explains candidate retrieval, deduplication, rank fusion and reranking, including how Reciprocal Rank Fusion (RRF) merges results by rank. Hybrid search is not always more accurate. Learn to test quality with code, paraphrase and no-answer queries and spot biases from permissions, filters and duplicate content.
Sources
- Canva: Creating designs using templatesChecked:
- Canva: Setting up Brand KitChecked:
- Canva: Downloading and purchasing contentChecked:
- Canva: Downloading with transparent backgroundsChecked:
- Canva: Export file typesChecked:
- Canva: Margins, bleed, and crop marksChecked:
- Canva: Flattening PDFsChecked:
- Canva: Current content licensing termsChecked:
Compiled from the references and verification dates listed above; fares, schedules, product features, and terms can change, so please confirm the latest details on the relevant official website before travelling, booking, or purchasing.