Lifestyle
Build a personal blog with WordPress: from categories to your first post
To start a personal blog, decide what questions you want to answer over time, then plan the homepage, post list and basic pages. Using WordPress as an example, this guide develops a writing workflow from content categories and reading layouts through the first post and later updates. It also covers checks for post cards, pagination and comments. It is for readers in Taiwan who want to turn their notes into public content: finish a small but complete site first, then add features as needed.
About 7 min read
Contents
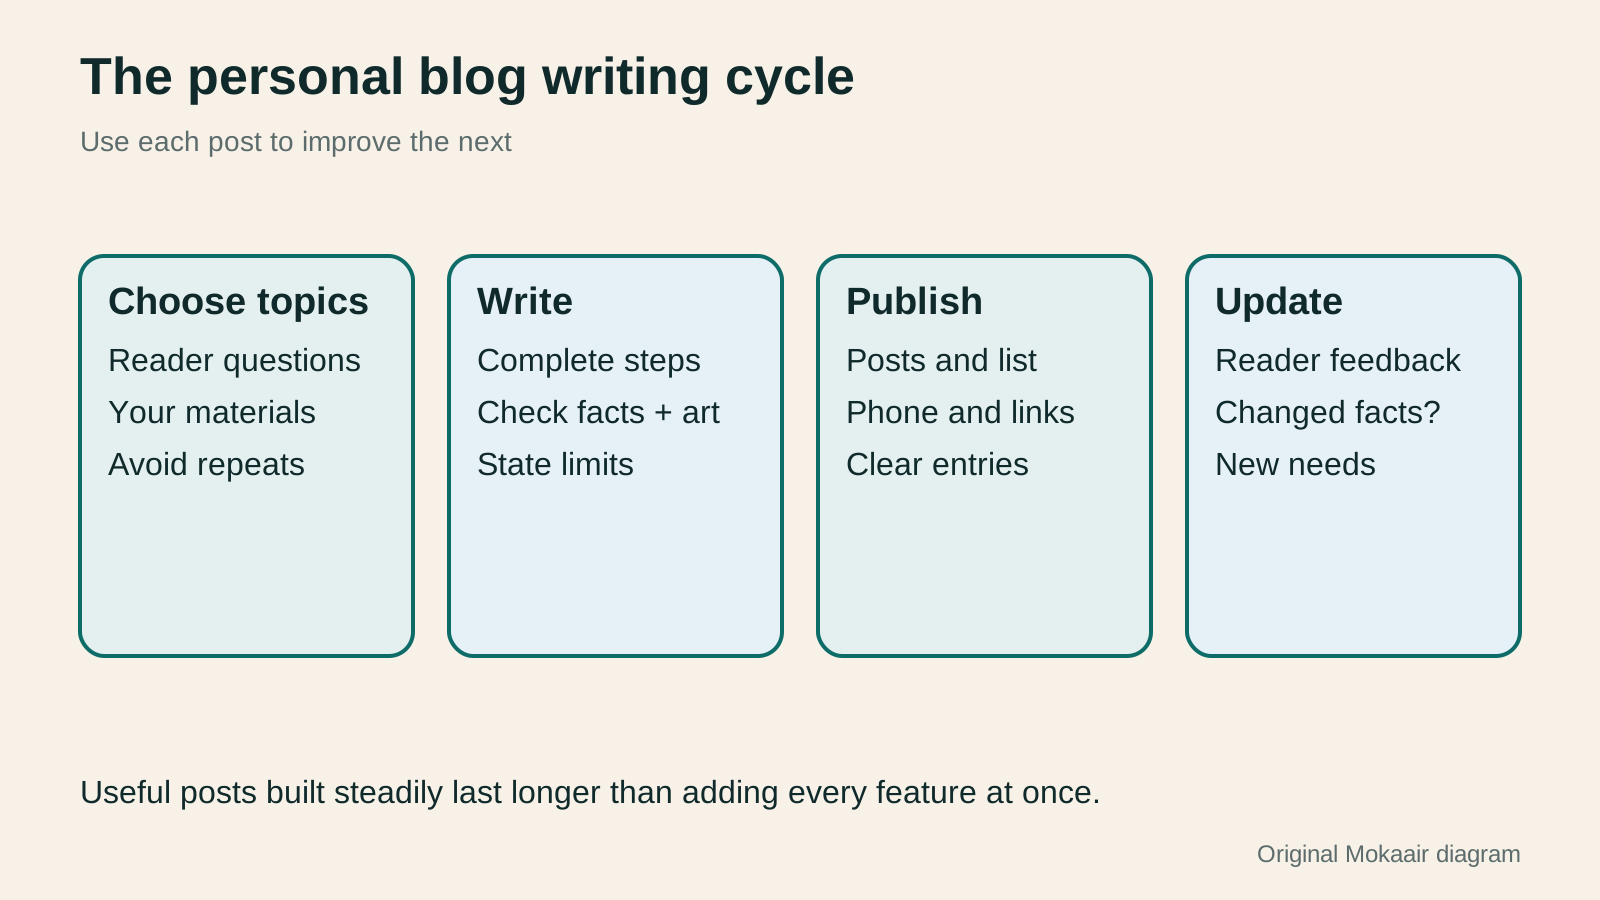
The hardest part of a personal blog is often not installing WordPress. It is knowing what to write next month and whether readers can find older posts. If you spend all your time on animations and layouts at the start, you may have a beautiful site with only an introduction. Establish a rhythm for content first, then use site features to support it.
This guide uses a fictional weekend crafts journal to plan material notes, making steps and project retrospectives. It is an original site-building scenario and makes no claim about traffic or income. WordPress settings are drawn from official documentation. Other site-building guides cover hosting and domain installation; this article focuses on content structure and everyday writing.
Define the blog's purpose in one sentence
Write down whom you hope to help, what type of problem you address and what you can offer. A weekend crafts journal might help beginners understand material choices and the making process instead of trying to cover every lifestyle subject. Your focus need not be permanent, but it should help you decide whether the next topic belongs on this site.
List ten questions you actually want to answer, then group them into a small number of themes. How to store materials, choose tools and adjust a failed project are different reader questions. If all ten topics really answer the same question, combine them into one complete post first rather than splitting them into thin posts just to increase the count.
For each topic, mark the materials you already have, information you still need to verify and photos you still need to take. For a tool you have not used yourself, you can summarize official instructions and selection criteria, but do not present them as your own hands-on review. Distinguish facts, inferences and preferences in everyday notes too, so readers know where your advice applies.
Build the smallest useful site structure first
At the outset, a homepage, post list, About page, contact method and a few categories may be enough. Explain the author's background and content scope on the About page and provide a contact channel that works. If you are not accepting collaborations or consultations, say so plainly; do not create a service entry point you cannot answer just to make the site look complete.
WordPress Reading settings let the homepage show the latest posts or a selected page. If you want the homepage to introduce the site before guiding readers into topics, use a static homepage with a posts page. If the site is primarily an ongoing journal, a post list can be the homepage. Choose based on what readers need to find; a more elaborate setup is not automatically more professional.
Keep the main menu to primary entry points and connect related posts within the content. A guide to organizing craft materials can link to a tool-selection post, and a finished-project review can link back to the making steps. Let content needs define those relationships. Do not put every post in the main menu or paste the same long list of links at the end of each article.
Test the reading layout with a real post
Add a post near the length you expect to publish, with section headings, steps, images and links, then inspect the layout. One line of sample text cannot reveal line-spacing problems, long-title wrapping or cropped images. On phones, check type size, contrast and button dimensions; do not choose a theme solely because it looks attractive on a large screen.
A Query Loop block can build the post list, define which content appears in repeated cards and add pagination. Official documentation notes that card titles and featured images do not link to the post automatically in every layout; check the link settings. During acceptance testing, actually click both title and image instead of merely checking that they appear.
The list must also cope with no posts, very long titles and different image ratios. With few posts at the beginning, pagination problems are easy to miss. Use enough sample content in a test environment to check that the next page works. Do not publish large amounts of low-value test content to fill the layout; remove the sample data after testing.
Let the first post solve one complete problem
Choose a topic you can explain clearly without making it too broad, such as how to sort frequently used craft materials on a small desk. Describe the reader's problem first, then give steps, trade-offs and a way to check the outcome. A concrete scenario helps readers judge whether it applies more than a broad statement that organization matters.
Finish the substance before fine-tuning every paragraph's appearance. Use your own data and photos for firsthand examples. When citing product features, versions or rules, check official sources and record the date. Describe failures and limits honestly when they matter; do not frame every attempt as a success or invent test data to make the post look complete.
After the first draft, look for repeated passages, unanswered questions and steps with missing prerequisites. The title should match what the body delivers; the summary should explain how the post helps. If readers may begin from two different conditions, use a comparison table or separate short sections so they know which path applies before starting.
- Choose a specific problem and list the reader's starting conditions and intended outcome.
- Gather your own materials and primary sources; flag claims still awaiting verification.
- Write complete steps, limits and original examples, then add suitable images and related links.
- Preview, proofread and check the published post; record what needs updating next time.
Plan a publishing rhythm you can sustain
Instead of setting a weekly post quota alone, estimate the time needed for topic selection, fact-checking, writing, images and proofreading. During busy periods, fewer complete updates may be more sustainable, and you still need time to revise older posts. In a draft list, record a specific next action, such as taking one photo, rather than only writing 'finish when free.'
Track posts as in preparation, awaiting verification, awaiting proofreading or published, with a clear condition for each transition. Before scheduling a post, confirm the site's time zone and that the content is finished; do not use scheduling only to force a rushed deadline. Review fast-changing tool features sooner. Preserve the original context of personal records rather than pretending every post applies forever.
Schedule basic maintenance as well: updates, backups, link checks and billing reminders. Writing posts and maintaining a website are different jobs. New content does not compensate for a contact form that cannot deliver messages. Each month, follow a path from the homepage to a post and then related content; this can reveal breaks that readers would encounter.
Set a manageable scope for comments and feedback
WordPress comments can be opened and moderated through settings. Whether to use them depends on your available time. If you open comments, decide how to handle spam, personal information and off-topic content, and tell readers replies may not be immediate. Comment count is not the only measure of post quality; you need not keep meaningless content just to make a page look busy.
When a reader asks a question, determine whether the original post is unclear, the information has changed or a new need deserves its own post. Correct the existing article where appropriate and retain necessary context; create and cross-link a new article for a different task. The blog can become more complete in response to readers' questions rather than only growing in total post count.
| Task | Smallest workable approach | What to check at completion |
|---|---|---|
| Focus | One sentence and ten reader questions | Whether topics stay focused |
| Structure | Homepage, posts, About and contact | Primary entry points are easy to find |
| Layout | Test with a realistically long post | Phone display and card links |
| Writing | One complete problem per post | Steps, examples and sources |
| Maintenance | Check old posts and the site regularly | Links, backups and updates |
| Feedback | Moderate comments within your capacity | Questions lead to content improvements |
Choosing between posts and pagesWordPress posts and pages: choose the right content type and URLWordPress posts and pages both hold text and images, but serve different purposes and are organized differently. Using a fictional community baking school, this guide explains when to use each, then covers blocks, excerpts, featured images, URLs and prepublication checks. Follow a repeatable workflow for your first item, and keep links stable when updating published content instead of assuming that a title edit leaves its URL and layout untouched.Read the full article
Organizing categories and menusWordPress categories, tags and menus: help readers find the next articleCategories, tags and navigation menus organize posts, connect details and provide entry points in different ways. Using a fictional home-cooking site, this guide explains naming and creating categories and tags, setting up navigation in block or classic themes, and checking mobile and keyboard use. It also covers what URLs and mappings to preserve when renaming, changing a slug, merging or deleting, so a growing site remains easy to explore without listing every post in an oversized menu.Read the full article
Found this guide helpful? Share it with someone who needs it
Lifestyle
Before Resetting WordPress: Separate Content, Theme Settings, and Full Restore
Starting over in WordPress does not always require wiping the site. This guide compares style resets, content revisions, database resets, and full restores; explains the scope of WP Reset and the limits of its snapshots; and walks through a test site, backup checks, and acceptance after a reset. It helps ordinary users in Taiwan identify the actual problem and choose a suitably narrow action with a recovery plan.
Lifestyle
WordPress Performance Plugins: Caching, Images, and Feature Conflicts
WordPress performance plugins need settings matched to the actual site; enabling every option at once is unsafe. Using a small Taiwan-based course and shop site, this guide compares WP Rocket and NitroPack, divides responsibility for caching and images, and shows how to diagnose conflicts caused by CSS and JavaScript optimization. A comparison table, staged workflow, and original diagram help administrators retain a measurement baseline and verify forms, menus, and shopping flows.
Lifestyle
Handling WordPress Comment Spam: Review Rules and Akismet
Stopping spam in WordPress comments takes sensible moderation rules and a way to correct mistakes, as well as a plugin. This guide covers discussion settings, Akismet activation and plan eligibility, reporting spam, and rescuing legitimate comments. Its daily review checklist helps small-site owners reduce the workload while leaving room for readers with real questions to join the discussion.
Lifestyle
WordPress Social Login: Checking LINE, Google, and Facebook Connections
Adding LINE, Google, or Facebook login to WordPress takes more than a few buttons. This guide explains how the social-login plugin and provider applications divide the work, how to verify callback URLs, link existing accounts, assign registration roles, and prepare another route before disabling a provider. Using Nextend Social Login as an example, it helps Taiwan-based site owners confirm that ordinary visitors can actually reach their original member accounts.
Sources
- WordPress: Reading settingsChecked:
- WordPress: Query Loop blockChecked:
- WordPress: Managing commentsChecked:
- Google: Creating helpful, reliable content for peopleChecked:
Compiled from the references and verification dates listed above; fares, schedules, product features, and terms can change, so please confirm the latest details on the relevant official website before travelling, booking, or purchasing.