Lifestyle
Placing ads in WordPress posts: Ad Inserter and the reading experience
WordPress ad placement requires attention to the source of the code, the reading experience and mobile interactions. Using an original paper-model tutorial site as an example, this guide explains the boundaries of Auto ads, manually placed ad units, Site Kit and Custom HTML. It covers duplicate code, page exclusions, layout shifts and differences caused by login status, with steps, a comparison table and an original diagram to help site owners configure ads they can check, adjust and roll back.
About 8 min read
Contents
- 1. Map reading areas where ads may fit and areas to exclude
- 2. Separate the jobs of Auto ads, ad units and WordPress plugins
- 3. When adding a unit, check the output after saving
- 4. Automatic exclusions and manual removal are different settings
- 5. Check width, shifts and usable space on mobile
- 6. Compare under consistent conditions and keep a rollback record
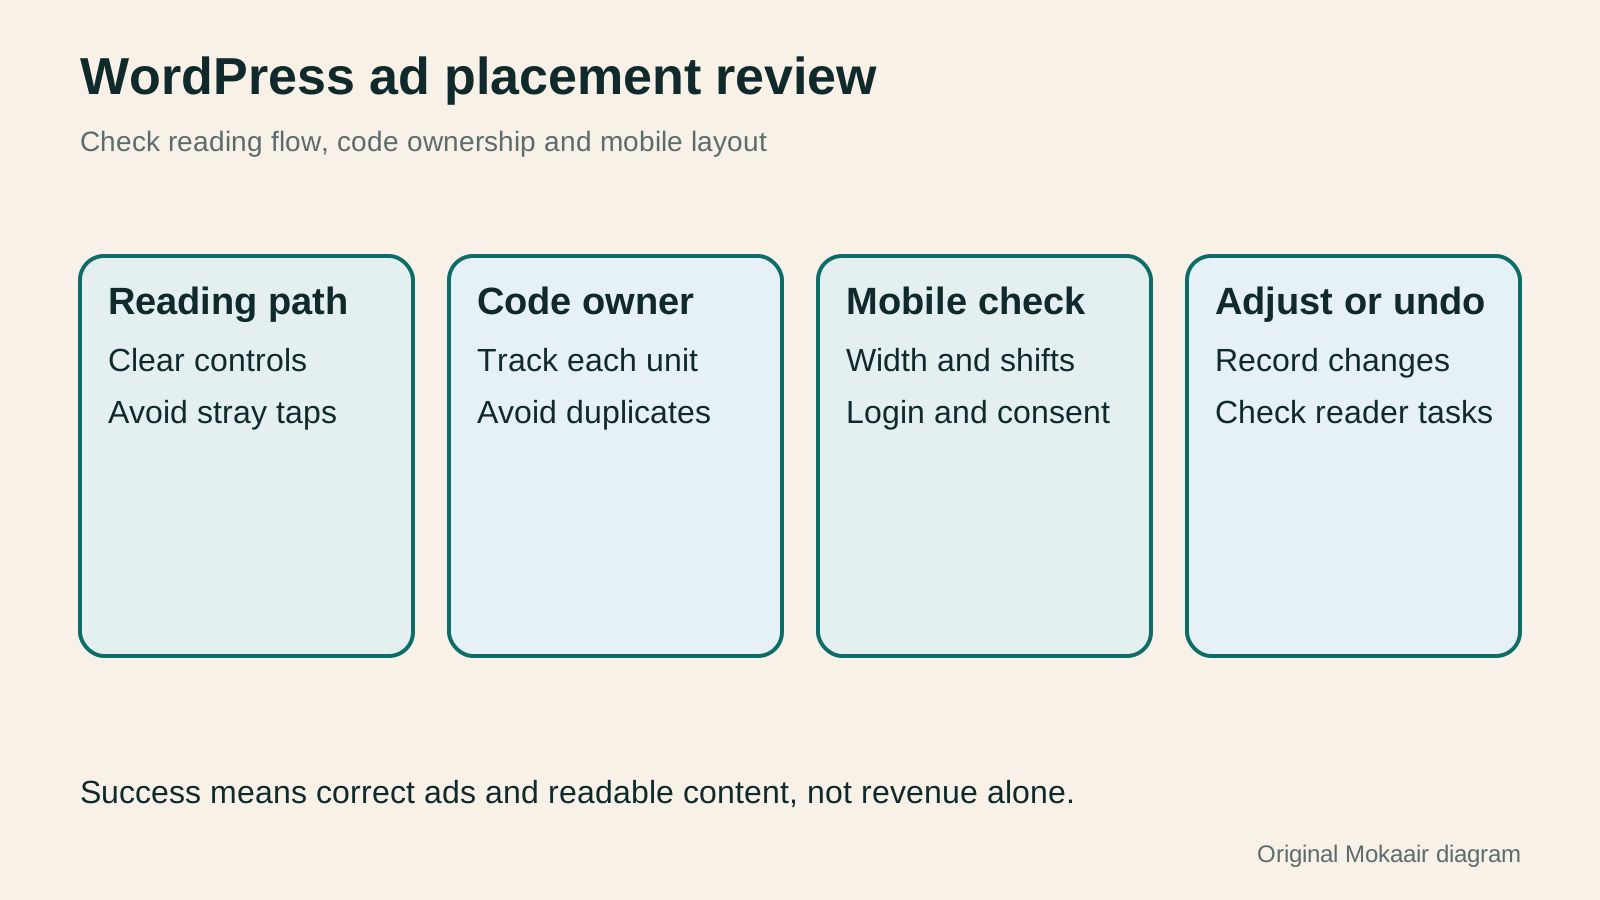
A paper-model tutorial site wants to show ads within articles, but readers often need to follow instructions while opening pattern downloads. If an ad crowds the download button or pushes a step down as it loads, the site may become difficult to use even when the dashboard begins to show revenue. Start placement planning with the reader's path through the task.
This guide focuses on a WordPress site using AdSense and draws on official Google, Site Kit, WordPress and web.dev documentation checked on September 14, 2026. The paper-model site and test scenarios are original. We did not install ads on a live site, click ads or measure actual revenue. Check the policies of any other ad network separately.
Map reading areas where ads may fit and areas to exclude
The example paper-model post includes a materials list, fold-line instructions, step images, a download entry and common questions. A site owner can first consider an ad after a complete paragraph, while keeping space around downloads, pagination, expandable steps and form buttons for interaction. This is a design choice for the example, not a universal formula that guarantees policy compliance at any given spacing.
AdSense prohibits making ads look like navigation, download links or other content. Do not encourage clicks with arrows, animation or wording such as 'support this site.' Labels should clearly identify an ad. Do not place one under a heading for recommended patterns or essential tools where readers may mistake it for an editorial pick. A layout can cause problems even when accidental clicks are unintended.
Try one post template first, then check whether other templates apply the same placement. Short notices, search pages with no results and pages consisting mainly of private messages should not inherit a long tutorial's insertion rule. Do not split content into empty pages just to add placements, and do not treat the homepage view as a test of the whole site.
Separate the jobs of Auto ads, ad units and WordPress plugins
Google decides placements for Auto ads within the configured scope; for an ad unit, the site owner chooses its location on the page. The two approaches can be combined, but make clear which one controls each position. If you only want to control one placement at the end of a post, you can assess a manual unit first rather than enabling every automatic format immediately.
Site Kit can connect AdSense, place the code needed for Auto ads and show reports, but it cannot manually insert each ad unit. Connecting AdSense to Site Kit does not mean every placement has been chosen. Check formats, density, page exclusions and other Auto ads settings in the AdSense dashboard.
If the theme, an ad-management plugin or existing code already inserts AdSense, inventory those sources before assigning the job to Site Kit. Google warns that placing the code twice can cause errors. The example site owner can keep a table showing which tool manages site-wide code and where each unit enters each template, so contributors do not add another copy.
When adding a unit, check the output after saving
AdSense distinguishes site-wide AdSense code from ad-unit code. For a manually placed unit, create it in your own account and copy the correct code before placing it through the selected theme area or insertion tool. Do not publish a sample publisher ID from a tutorial as your own, and do not modify the code to refresh automatically or generate impressions.
For a placement in just one post, a Custom HTML block is an option to assess. Whether scripts survive saving depends on WordPress capabilities and site rules. WordPress 7.0 documentation describes separate HTML, CSS and JavaScript editing panels; without the unfiltered_html capability, restricted tags are cleaned. Not every editor can paste and retain a script.
After saving, check the front-end output and your own publisher information. Text still visible in the editor does not prove the installation works. If a block, theme or security rule removes required code, ask someone with the appropriate permissions to manage it in the proper place. Do not promote all contributors to administrators or disable site-wide protection merely to run ads.
Automatic exclusions and manual removal are different settings
The Auto ads preview lets you adjust formats, the number of in-page ads and spacing. Excluded areas remove in-page automatic placements from an area of a page; Page exclusions target specific pages. Their scopes differ: excluding an area near a paragraph does not mean every overlay format on that page is also disabled.
If a pattern download page needs Auto ads excluded entirely, check its URL and scope in Page exclusions. If the theme also inserts a manual unit on the page, review your own insertion rule separately. An Auto ads switch is not a master switch for all third-party code or manual placements.
After previewing, save and apply the settings, recording the change time and previous values. If you use experiments, understand which settings support them and whether a result can be adopted automatically. Google's documentation says Page exclusions are not an experimentable setting, so do not describe every option as freely available for split testing.
Check width, shifts and usable space on mobile
A fixed width that fits a desktop sidebar may not fit a phone. Google recommends considering responsive ad units for responsive sites; fixed sizes do not adapt automatically when screen orientation changes. At narrow widths, in landscape and with enlarged text, check for horizontal overflow, clipping and content covered by ads. Merely shrinking a screenshot of the full page is not enough.
An ad that loads later can cause cumulative layout shift: the download button suddenly moves just as a reader tries to tap it. web.dev recommends reserving space for late-loading content and adjusting containers by device. Assess reserved height against the sizes that may appear. Do not collapse the space immediately just to remove a gap, causing the text below to jump repeatedly.
If a responsive unit should be hidden at certain sizes, Google provides permitted modification examples. Follow that documentation so the hidden unit also sends no ad request. Do not merely make a loaded ad transparent, cover it or crop it. Every size adjustment must still comply with placement policy; technical feasibility is not permission to alter ad behavior arbitrarily.
Compare under consistent conditions and keep a rollback record
Ads placed by Site Kit are excluded for logged-in users by default, so an administrator seeing no ads while signed in may be seeing normal behavior. Record login state, browser, consent choices and device during acceptance checks, then check as an ordinary visitor. Privacy choices or browser blocking may also affect display; a blank space is not a reason to insert the code again.
Caching, minification or deferred-execution tools can change ad scripts. If something breaks after configuration, compare recent changes and actual output, then investigate one factor at a time in a controlled environment; do not disable every plugin on the live site at once. Keep ad serving conditions the same when assessing performance. Comparing a page with ads against one with no ads cannot isolate the cost of a particular plugin.
The example site can record its post templates, placements, before-and-after mobile views, loading state and settings needed for rollback. After real ads run, examine revenue alongside reading and download tasks; never click your own ads to test them. If an ad blocks an interaction, roll back the problematic placement first and then find the cause rather than waiting for more revenue data.
- Map content, interaction areas and proposed ad positions in the post, including pages that need exceptions.
- Assign one tool to manage each code source and unit; remove duplicates and inspect the saved result.
- Check Auto ads formats and exclusion scope, then inspect mobile loading as a visitor.
- Record changes, reading tasks and rollback steps; evaluate the setup under consistent conditions.
| Method or setting | Main use | Still check separately |
|---|---|---|
| Auto ads | Place ads automatically under the chosen settings | Formats, density and the actual reading path |
| Manual ad unit | Control a specific insertion position | Templates, devices and policy |
| Site Kit | Connect services, place code and show reports | Cannot manually insert units |
| Custom HTML block | Save permitted code at a content position | Permissions, sanitization and actual front-end output |
| Excluded areas | Exclude an area from in-page Auto ads | Does not disable every format on the page |
| Page exclusions | Exclude Auto ads from specified pages | Manage manual units on those pages separately |
Prepare your site for AdSense and its review
Understand Site Kit integration and permissions
Technical SEO audit order: crawling, indexing, rendering, and site structureTechnical SEO audit order: crawling, indexing, rendering, and site structureA useful technical SEO audit needs reproducible evidence and a sensible repair order. Using a site relaunch as an example, this guide explains how to sample page templates and check public access, indexing directives, JavaScript rendering, canonical URLs, and site structure. It separates urgent repairs, scheduled improvements, and later observation so that a general site owner can hand actionable findings to maintainers without treating a passing test as a ranking guarantee.Read the full article
Found this guide helpful? Share it with someone who needs it
Lifestyle
Before Resetting WordPress: Separate Content, Theme Settings, and Full Restore
Starting over in WordPress does not always require wiping the site. This guide compares style resets, content revisions, database resets, and full restores; explains the scope of WP Reset and the limits of its snapshots; and walks through a test site, backup checks, and acceptance after a reset. It helps ordinary users in Taiwan identify the actual problem and choose a suitably narrow action with a recovery plan.
Lifestyle
WordPress Performance Plugins: Caching, Images, and Feature Conflicts
WordPress performance plugins need settings matched to the actual site; enabling every option at once is unsafe. Using a small Taiwan-based course and shop site, this guide compares WP Rocket and NitroPack, divides responsibility for caching and images, and shows how to diagnose conflicts caused by CSS and JavaScript optimization. A comparison table, staged workflow, and original diagram help administrators retain a measurement baseline and verify forms, menus, and shopping flows.
Lifestyle
Handling WordPress Comment Spam: Review Rules and Akismet
Stopping spam in WordPress comments takes sensible moderation rules and a way to correct mistakes, as well as a plugin. This guide covers discussion settings, Akismet activation and plan eligibility, reporting spam, and rescuing legitimate comments. Its daily review checklist helps small-site owners reduce the workload while leaving room for readers with real questions to join the discussion.
Lifestyle
Build a personal blog with WordPress: from categories to your first post
To start a personal blog, decide what questions you want to answer over time, then plan the homepage, post list and basic pages. Using WordPress as an example, this guide develops a writing workflow from content categories and reading layouts through the first post and later updates. It also covers checks for post cards, pagination and comments. It is for readers in Taiwan who want to turn their notes into public content: finish a small but complete site first, then add features as needed.
Sources
- Google: AdSense ad placement policiesChecked:
- Google: AdSense program policiesChecked:
- Site Kit: AdSense features and ad-unit limitationsChecked:
- Site Kit: Managing duplicate code placementChecked:
- Google: AdSense code and ad-unit codeChecked:
- WordPress: Custom HTML and script permissionsChecked:
- Google: Auto ads settings and exclusionsChecked:
- Google: Auto ads experiment limitationsChecked:
- Google: Fixed-size ad-unit limitationsChecked:
- web.dev: Reserving space and layout shiftsChecked:
- Google: Permitted responsive ad modificationsChecked:
- Site Kit: Troubleshooting AdSense displayChecked:
- Site Kit: Comparing front-end performanceChecked:
Compiled from the references and verification dates listed above; fares, schedules, product features, and terms can change, so please confirm the latest details on the relevant official website before travelling, booking, or purchasing.