GuideOsaka & Kyoto
Before Renting a Bike in Kyoto: Plan Around Parking, and Don't Treat Cycling as a Universal Shortcut
Cycling in Kyoto is about more than finding a rental: you need to know where to park and which stretches to walk. Use official parking information, rental terms, and the day's weather to decide whether a bicycle suits your itinerary.
About 7 min read
Looking at Kyoto's street grid, it is easy to imagine that one bicycle could replace every other form of transport. When planning an actual route, parking locations, pedestrian density, and return terms often determine how practical cycling will be before rental prices come into it. This article covers choosing bicycles for sightseeing in the city. It does not repeat bus and subway guides or guarantee that routes you can connect on a map are rideable.
Check whether your itinerary suits cycling
Kyoto's official tourism information describes the city center as relatively flat, with an easily recognizable street layout, while also reminding visitors to follow local rules. These features do not mean cycling is easy around every attraction or equally effortless near the hills. First, consider whether the day's destinations are clustered together, whether you are comfortable walking the final stretch, and whether your companions are familiar with riding on roads. If anyone is uncomfortable cycling, has bulky luggage, or faces unfavorable weather that day, public transport will make it easier to travel together.
Do not combine your first ride in an unfamiliar city with your busiest sightseeing day. Start with a small area near your accommodation, with a simple route and clearly identified parking, then decide after the ride whether to go farther. An electric-assist bike reduces some pedaling effort; it will not interpret intersections for you, thin out crowds, or provide parking space. Choose a bike whose weight, saddle height, and brakes you can handle, rather than automatically picking the largest one because it looks easier to ride.
Read the full description
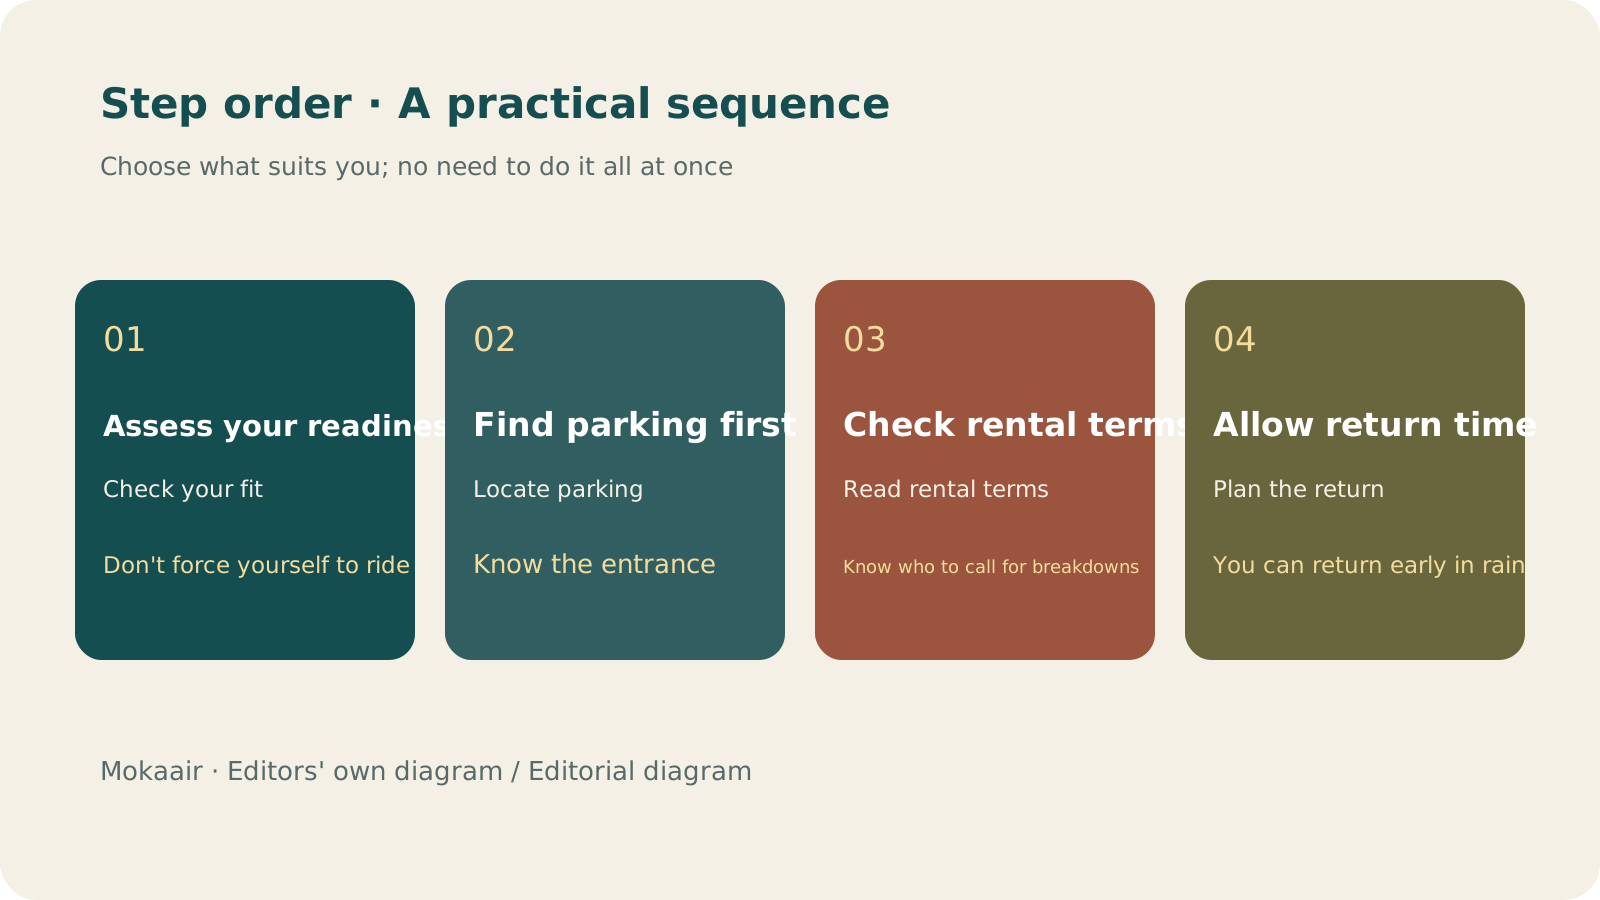
Check in order: assess whether cycling suits you, find parking first, review rental terms, and allow time for return. Compiled by the editors; not a map or measured travel times.
Put parking on the map before attractions
Kyoto's official website explicitly reminds visitors that bicycles cannot be parked wherever they like on the street; designated parking facilities should be used. First, check official parking information near your destination, note the entrance and available hours, then look up the walking route from the parking location to the attraction. An empty space outside a shop, or other people parking there, is not proof that parking is allowed. Check on-site signs to confirm whether temples, shopping centers, or private parking facilities accept your type of bike.
| Planning item | Information to obtain first | Adjust if unsuitable |
|---|---|---|
| Rental shop | Bike type, return location, and return time | Switch to a half-day rental or public transport |
| Each destination | Legal parking locations and entrances | Choose alternative parking nearby, then walk |
| Busy pedestrian areas | Local signs and access restrictions | Dismount and walk your bike, or take a detour |
| Return trip | Route back and time to spare before return | Drop the final attraction |
If you want to visit several nearby attractions, parking once and walking for a while may be easier than finding a new parking space at every stop. Conversely, if legal parking at both destinations is far from their entrances, a bicycle may offer little advantage. Include parking charges and walking requirements in your comparison, rather than judging transport efficiency only by “how many minutes it takes to cycle between two attractions.” The diagram provides only a decision-making sequence; actual routes must follow local traffic signs and information available that day.
Ask about all rental restrictions
Before collecting the bike, confirm the return deadline, whether returns at another location are allowed, how late returns are handled, whom to contact for breakdowns, and what insurance covers and excludes. Photograph the bike's condition, test the brakes, lights, and lock, and ask staff to adjust the saddle height. If you choose an electric-assist bike, check how charging or low battery levels are handled; do not estimate its range on every route based on your own commuting experience. If you need a child seat or other accessories, check the shop's conditions for using them in advance, and do not fit noncompliant equipment yourself.
Kyoto's official cycling page provides resources on safety rules and parking, along with information about the traffic violation system. Read the current rules before heading out. This article does not compile fine schedules that can quickly become outdated or treat riding habits from other countries as Japanese rules. Keep your phone put away while riding. If you need to check a map, stop somewhere you will not obstruct others. Park the bike properly before taking photos so that documenting your trip does not become a distraction.
Keep a backup option for rain or an early finish
When planning your day, set conditions for stopping further additions to the itinerary, such as heavier rain, someone feeling unwell, being unable to find legal parking, or approaching the return deadline. Returning the bike early does not mean the itinerary has failed; it can make the rest of the day manageable again with walking and public transport. If the bike breaks down, move to a safe location and contact the rental shop. Follow its procedure for collection or replacement, rather than leaving the broken bike by the roadside to catch a ride.
Map the return route before deciding how far to ride
Suppose you want to spend half a day in one area. Start by choosing pickup and return locations, then select two destinations with legal parking. Think of each leg as “walking from the parking location to the attraction's entrance” to avoid overestimating how much time cycling will save. If traveling between the main attractions requires crossing unfamiliar major roads, or there is nowhere suitable to park along the way, walking combined with public transport may better suit that day's needs. This is a comparison of travel routes, not an assessment of whether any particular road is suitable for you to ride on.
Before renting, write the return location, latest accepted return time, late-return procedures, and conditions for returning elsewhere on the same page. Some people remember only the shop's closing time without checking how long the return process takes; ask the operator directly about this. Once you have the bike, follow the operator's instructions to familiarize yourself with the brakes, lock, and adjustment methods, and report anything unusual on the spot. If you need to check navigation on your phone, stop somewhere appropriate first; do not operate it while riding.
Before leaving each parking location, photograph the parking facility's name and the nearby entrance, and keep any payment receipt or bike collection ticket. After visiting an attraction, you may leave through a different exit from the entrance you used. Find your parking location again before restarting navigation. When traveling in a group, also confirm that everyone has parked in the same area, so one person does not walk their bike to the next intersection while others are still searching at another entrance.
If the weather worsens in the afternoon or someone becomes tired, finish early using the return plan you have already confirmed. Do not make “there are still a few attractions we haven't visited” your only reason to keep riding. After returning the bike, keep the completion record and check that no personal belongings remain in the basket or attached bags before arranging your next transport. Even if you visit only two places in half a day, it can still be a complete, manageable outing.
- Read Kyoto's official cycling rules and parking information first.
- Save the parking entrance for each attraction, not just the attraction's location.
- Confirm breakdown, late-return, and insurance procedures when collecting the bike.
- Switch to walking if cycling is unsuitable, and leave time to return the bike.
On days unsuitable for cycling, see the Kyoto bus and subway guide
Guide
How to Choose Tokyo Transit Passes: Are Suica, Welcome Suica, the Tokyo Subway Ticket, and the JR Pass Worth It?
On a first Tokyo trip, start with an IC card and pay per ride (Welcome Suica has no deposit and is valid for 28 days). If you take four or more subway rides in a day, add a 72-hour Tokyo Subway Ticket for 2,000 yen; a JR Pass is never worthwhile if you stay in Tokyo and do not go to Kansai. See what TOURIST PASMO, Suica on iPhone, and the Tokyo Metro day pass do and do not cover, with a decision chart. Prices verified in September 2026.
Guide
Tokyo Disneyland and DisneySea Guide: Ticket Prices, Fantasy Springs, Disney Premier Access (DPA), Standby Pass, and Which Park to Choose for Your First Visit
Tokyo Disney one-day Passport prices vary: most weekdays in 9/2026 cost ¥9,900 and weekends ¥10,900. At 14:00 daily, tickets go on sale for the same date two months later. Free Priority Pass is no longer on the official service list; only paid Disney Premier Access (¥1,000–3,500 per person per use) shortens waits. Covers hours, the 25th anniversary, Standby Pass, Entry Request, Fantasy Springs access and first-visit park choice; checked on the official site in 9/2026.
Guide
Narita and Haneda Airports to Central Tokyo: How to Choose Skyliner, N'EX, Keikyu, or the Airport Limousine Bus
From Narita to Tokyo: take Keisei Skyliner to Ueno in 36–41 minutes for ¥2,580; for Shinjuku or Tokyo Station, JR N'EX reaches Tokyo in as little as 53 minutes for ¥3,140; choose the TYO-NRT bus for ¥1,500 when budget comes first. From Haneda, Keikyu reaches Shinagawa in 11–14 minutes for ¥330. Includes fares and times for Access Express, Airport Limousine and Tokyo Monorail, plus a stay-area route guide; checked on official sites in 9/2026.
Guide
Taoyuan Airport Departure Guide: A1/A3 In-Town Check-in, Baggage, Liquids and Power Banks at Security, e-Gate Registration, and When to Leave (2026)
Departure-day guide from Taipei or New Taipei: check in online and confirm the terminal; use in-town check-in at A1 (06:00–21:30) or A3 (09:00–16:00), with a three-hour cutoff and different airlines; follow the 100 mL/one-liter liquids rule, the two-power-bank carry-on limit and lighter rules; check e-Gate rules for ROC nationals with household registration in Taiwan using an ROC passport, from age 10 and 120 cm; then calculate when to leave. Verified in September 2026 using Taiwan sources.